Hi guys, I haven't got into Gunpla since December 2012 up to now. Though I have my recently acquired tools/materials for my unfinished projects. Just got lazy and I don't have much time to work on to it because of this game.
The RO2 SEA server was published by AsiaSoft Corporation Co. Ltd. They started there Close Beta on December 7-12, 2012. And initially, the Open beta was announced and should have been released on December 27, 2012 but for some reasons it was delayed and moved to January 3, 2013. So much for the introduction, lets start the Beginners Guide.
Login
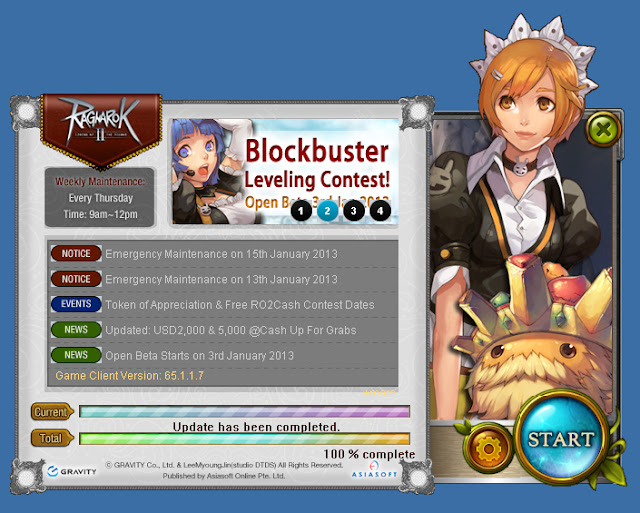 |
The Launcher looks like this. Mainly, it is composed of what is the latest Notices, Events and News.
Also, you can see the weekly maintenance schedule.
Though, since the start of Open Beta they have been casting maintenance from time to time even not in scheduled. |
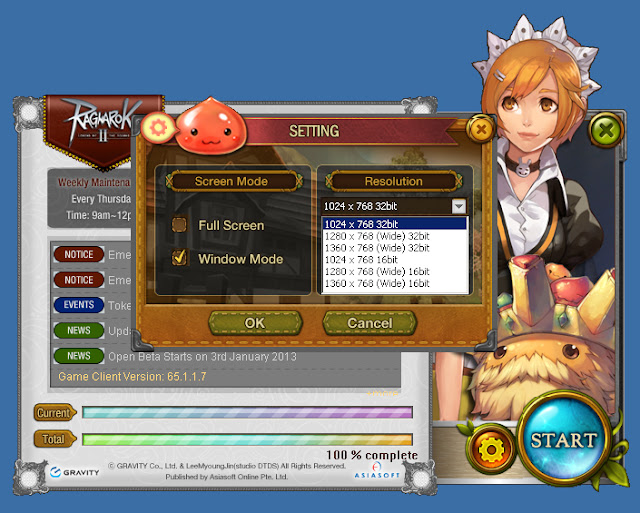 |
On the launcher, you can also see a Gear near the Start button.
It is where you can change the Screen Mode and Resolution.
After you have setup your settings you can press OK to save it and then START the game. |
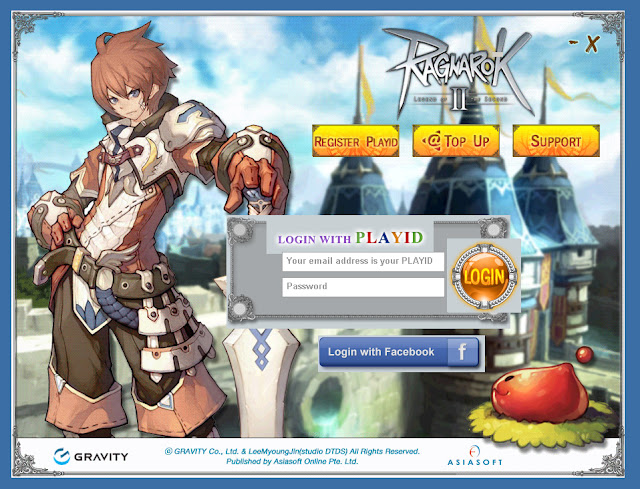 |
This is what will appear after clicking the START button.
This is where you can login your registered PLAYID email address.
If you haven't registered yet, you can click the REGISTER PLAYID button on top.
You can also topup @Cash for in-game cash in Item Shop, just click the @TOP UP button.
For problems, you can directly send inquiries by click the SUPPORT button. (you may need to fill-up some of your account details for this)
Of course you can also login with Facebook, just click the button. |
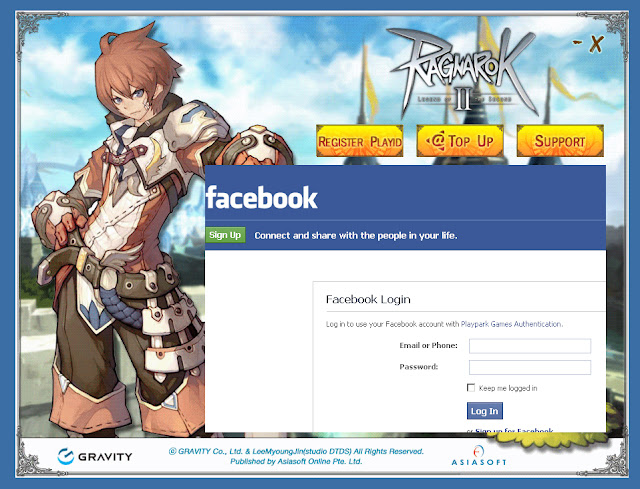 |
Unlike other games where you can login automatically using Facebook if you Facebook Account is already open.
You have to input your valid Facebook account to login. |
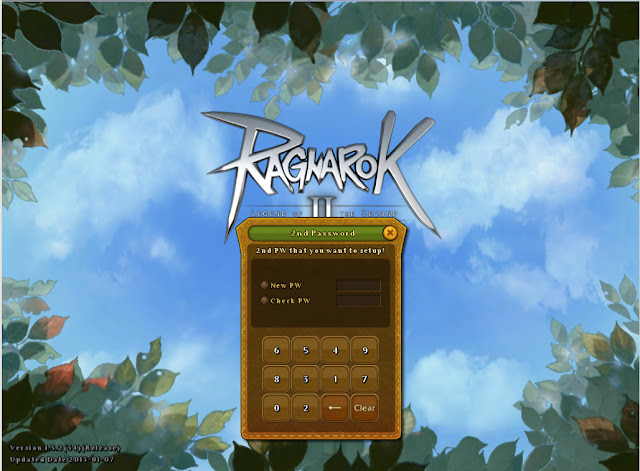 |
If you have logged-in for the first time. You have to setup for your second password.
It is composed of 4 digits and you may choose from 0 to 9. |
 |
After you have successfully setup your second password you can now input it.
Of course, you can also change your second password. |
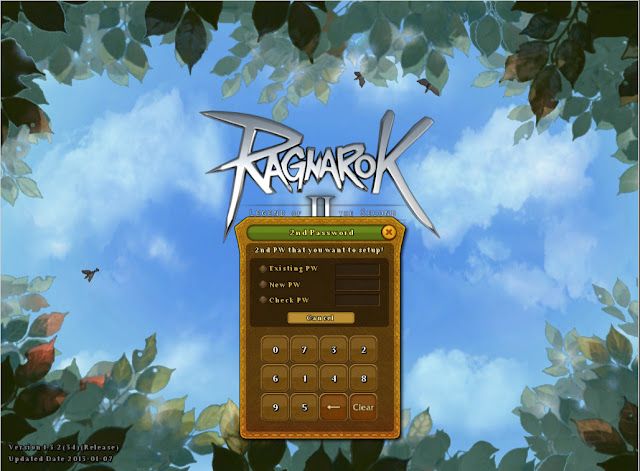 |
| In changing second password, you will need to input your current before creating your new second password. Lastly you need to input again your new second password and it will become successful if you have not mistaken any of the 3. |
 |
Currently, we have 3 available servers in the game. Namely Freyja, Einherjar and Jormungand.
Both Freyja and Einherjar have 12 channels and Jormungand has 20 channels. |
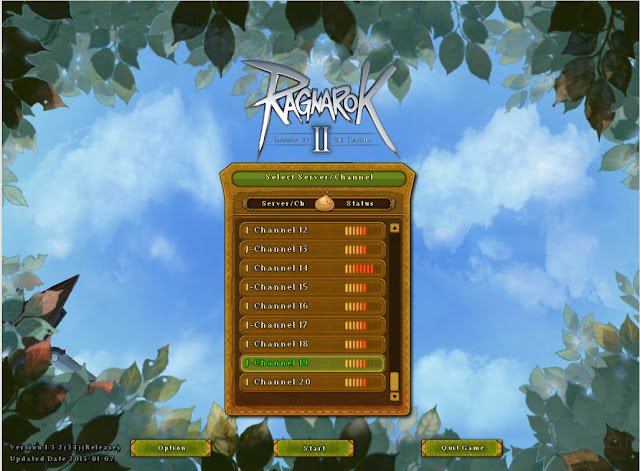 |
Channel names begins with the initial letter of the Server Name and followed by Channel #.
Since I have been playing in Jormungand since the start of OBT.
Lets create this Beginners Guide with my main accounts' current server.
I might have some things to do with this in the future. |
Character Creation
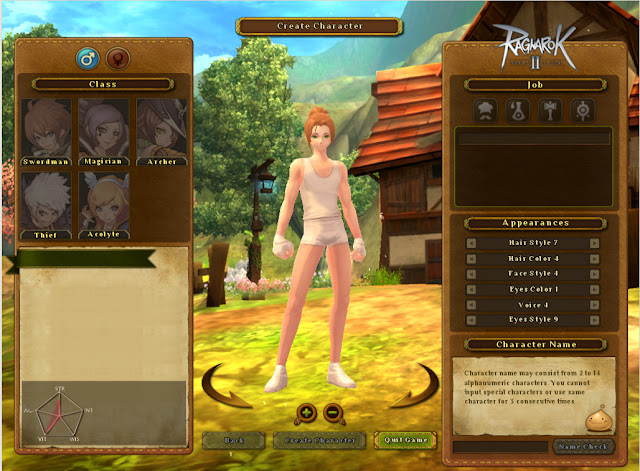 |
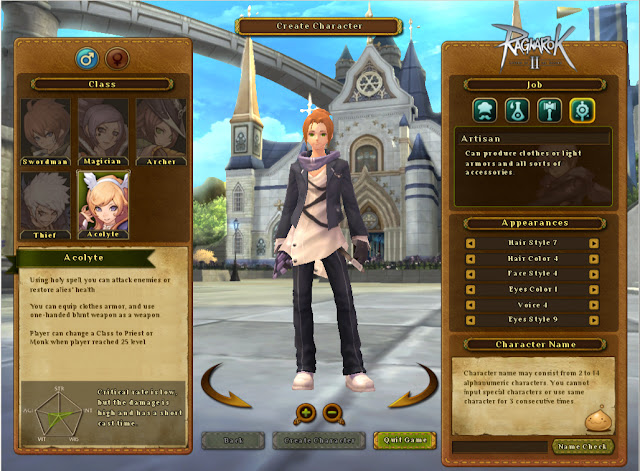
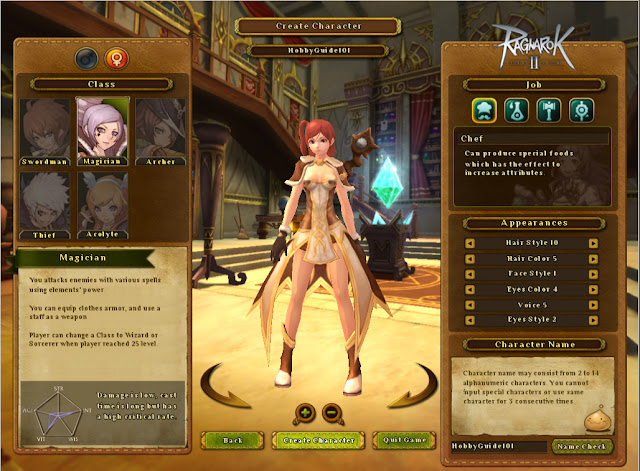
Upon entering the game for the first time. You will be directly in the Create Character view.
As default, you will have your character in his/her under wear.
You can rotate left and right your character by clicking those arrows under the character sprite or
hold click and move left and right to the character sprite itself.
You can also zoom in and out by clicking the Plus and Minus sign or scrolling up and down.
You can choose your gender Male or Female on the upper left corner of the screen.
There are 5 classes and 4 jobs you can choose from.
You can also change some of your Appearances available on the list.
Of course you'll be needing your Character Name consisting of 2-14 Alphanumeric characters.
You cannot input special characters or use same character for 3 consecutive times. |
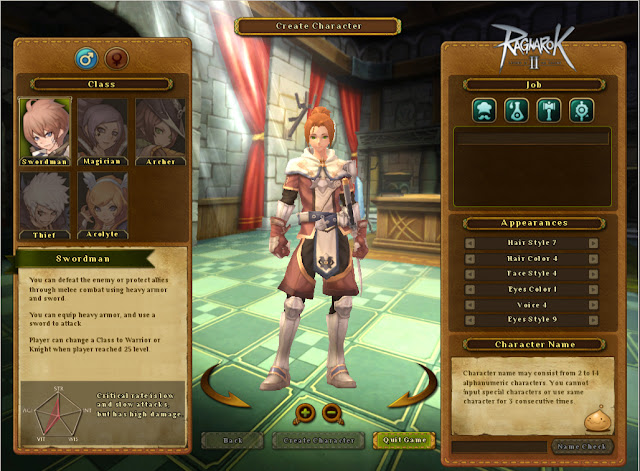 |
Swordsman: You can defeat the enemy or protect allies through melee combat using heavy armor and sword.
You can equip heavy armor, and use a sword attack
Player can change a Class to Warrior or Knight when player reached 25 level.
Stats: Critical rate is low and slow attacks, but has high damage. |
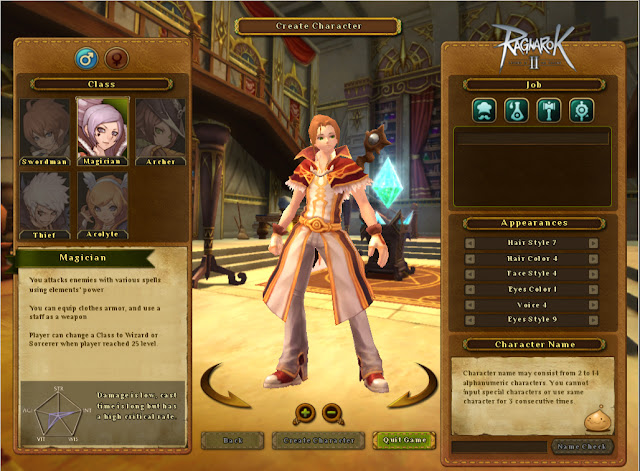 |
Magician: You attacks enemies with various spells using elements' power.
You can equip clothes armor, and use a staff as a weapon.
Player can change a Class to Wizard or Sorcerer when player reached 25 level.
Stats: Damage is low, cast time is long but has a high critical rate. |
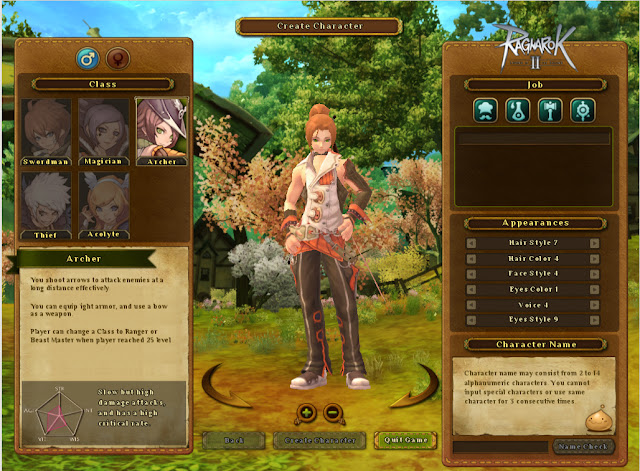 |
Archer: You shoot arrows to attack enemies at a long distance effectively.
You can equip light armor, and use a bow as a weapon.
Player can change a Class to Ranger or Beast Master when player reached 25 level.
Stats: Slow but high damage attacks, and has a high critical rate. |
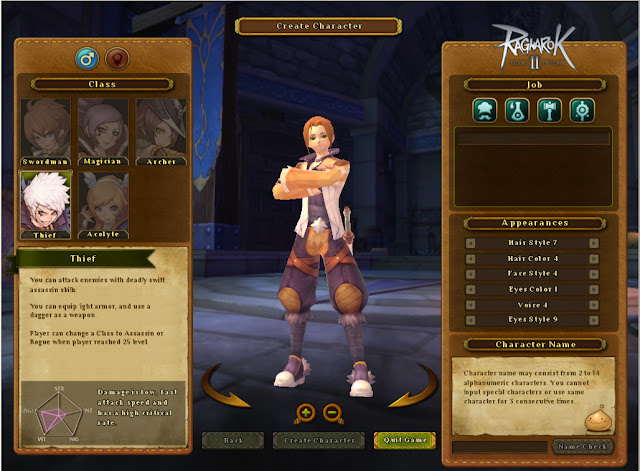 |
Thief: You can attack enemies with deadly swift assassin skills.
You can equip light armor, and use a dagger as a weapon.
Player can change a Class to Assassin or Rogue when player reached 25 level.
Stats: Damage is low, fast attack speed and has a high critical rate. |
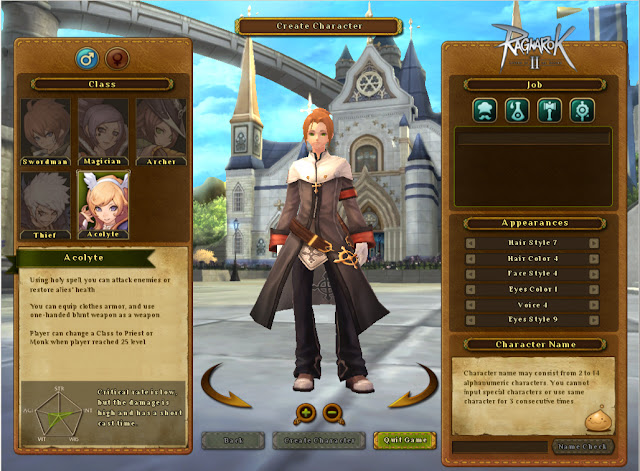 |
Acolyte: Using holy spell you can attack enemies or restore allies' health.
You can equip clothes armor, and use one-handed blunt weapon as a weapon.
Player can change a Class to Priest or Monk when player reached 25 level.
Stats: Critical rate is low, but the damage is high and has a short cast time. |
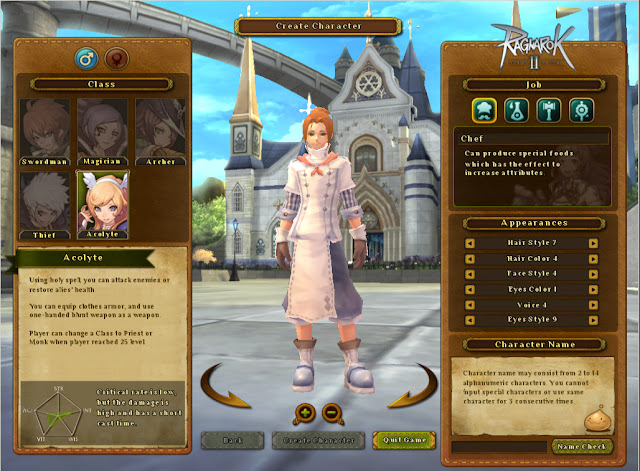 |
| Chef: Can produce special foods which has the effect to increase attributes. |
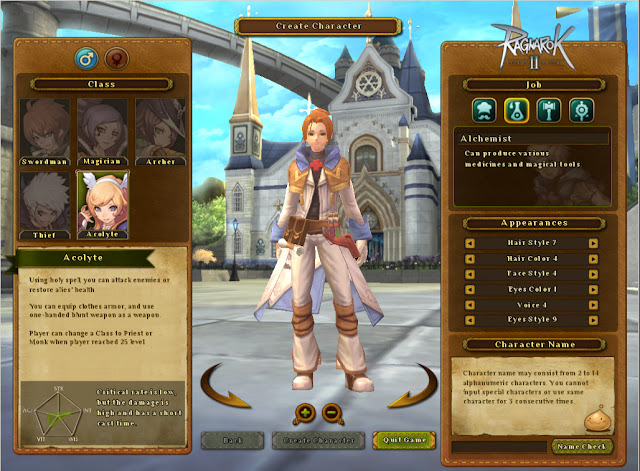 |
| Alchemist: Can produce various medicines and magical tools. |
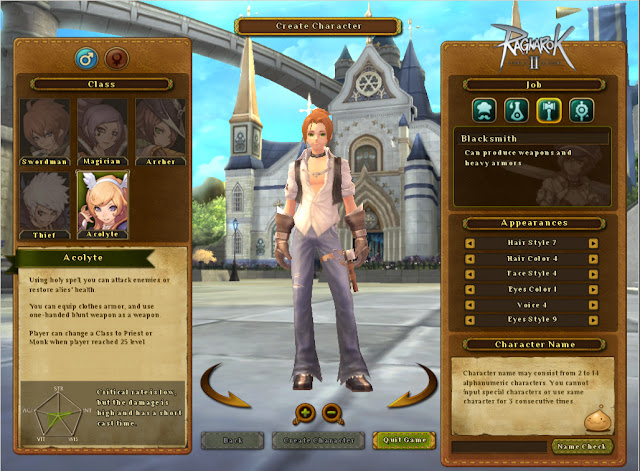 |
| Blacksmith: Can produce weapons and heavy armors. |
 |
| Artisan: Can produce clothes or light armors and all sorts of accessories. |
 |
| After you have setup your character, press Create Character button below. |
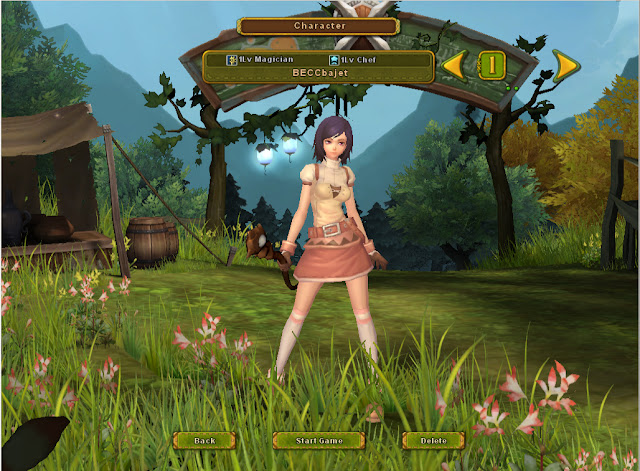 |
| Now you have your character you can Start the Game. |
Interface
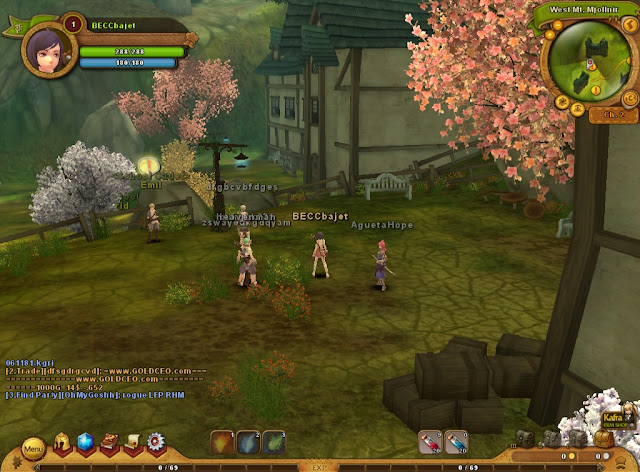 |
This is the area where you will start the game.
The interface is pretty much same as the other MMORPGs.
You can move your character using WASD key.
You can also your mouse to click on the group where you want to move.
Auto move is also available, just click scroll or the Num Lock key. |
 |
| Character Info (Hotkey "C") |
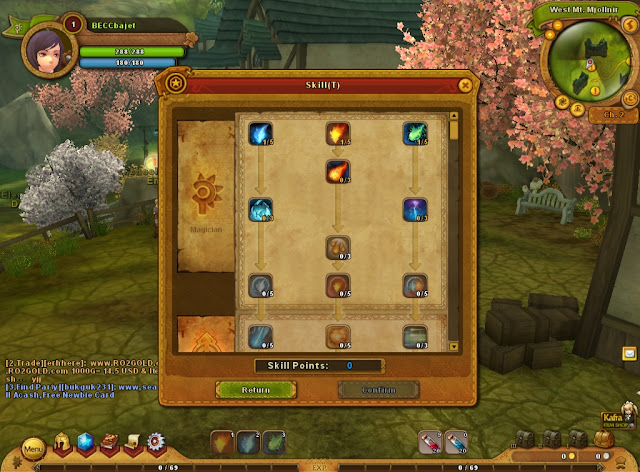 |
| Skill (Hotkey "T") |
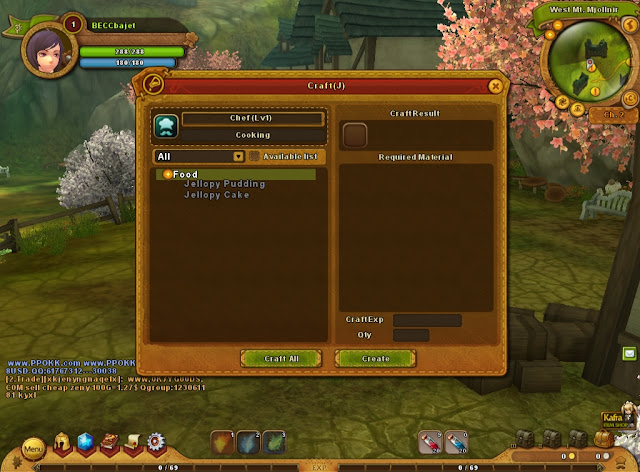 |
| Craft (Hotkey "J") |
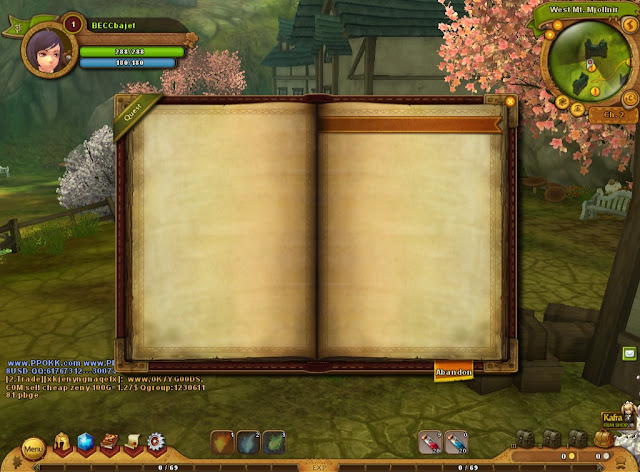 |
| Quest (Hotkey "L") |
 |
Bag (Hotkey "B")
There are 3 more expansion bags you can have which are dropped from killing monsters.
(Very Small, Small, Medium)
There is also a Super Large Bag which can be bought in Kafra Item Shop. |
 |
Card Collection (Hotkey "P")
Every time you get a card, it will be automatically registered in your Card Collection. |
 |
But the game has a lot of cards, so you can't hold on too much to keep.
The cards do have their own storage called Card Album.
I think you can have a free Card Album later on the game.
You can also buy it in the Kafra Item Shop. |
 |
Khara (Hotkey "O")
Other than the Main quests, you will also have this Khara.
From time to time the Khara will be unlocked and quest are available for you to accomplish.
Each Khara has different Rewards (Combat EXP, Profession EXP, Title with Stats, etc) |
 |
Mount (Hotkey "I")
Most of the mounts are from Kafra Item Shop.
The most common is the Peco Peco where you can buy in Prontera and be used at Level 15. |
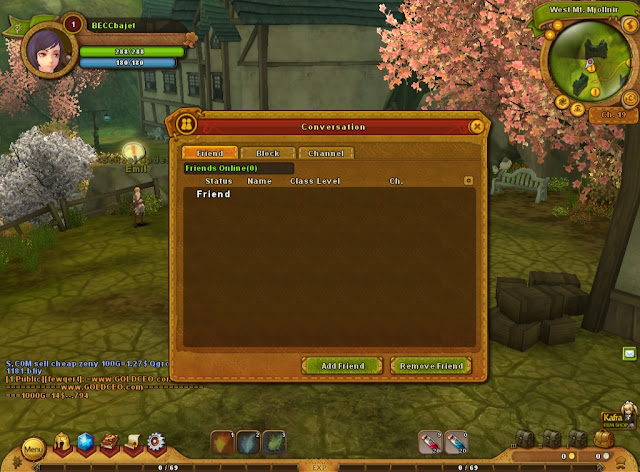 |
Conversation (Hotkey "U")
You can add friends, block people, etc. and can be found in this window. |
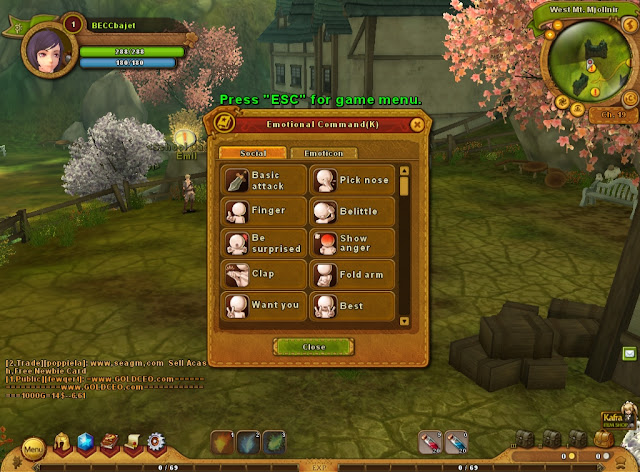 |
| Emotional Command (Hotkey "K") |
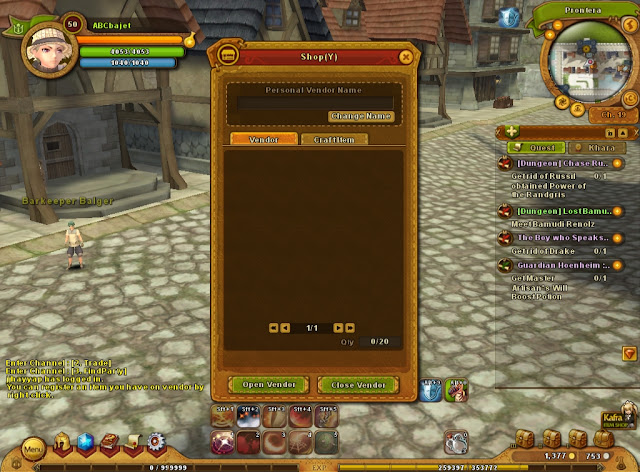 |
Shop (Hotkey "Y")
At Level 10, you can use your personal shop where you can sell your goods to other players. |
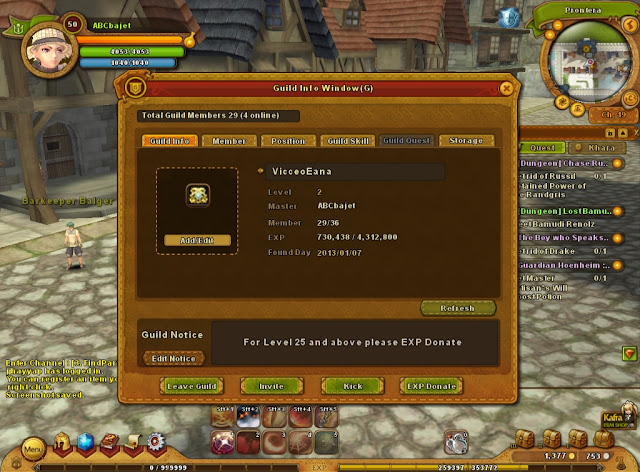 |
Guild Info Window (Hotkey "G")
At Level 10 you can create your guild in Prontera and cost you 20 zenny.
You can also join a guild from the start of the game if you wanted. |
 |
Union (Hotkey ";")
At level 50 you'll be able to join the union where you can get union quests and rewards you points that can be exchanged for items. |
The Game
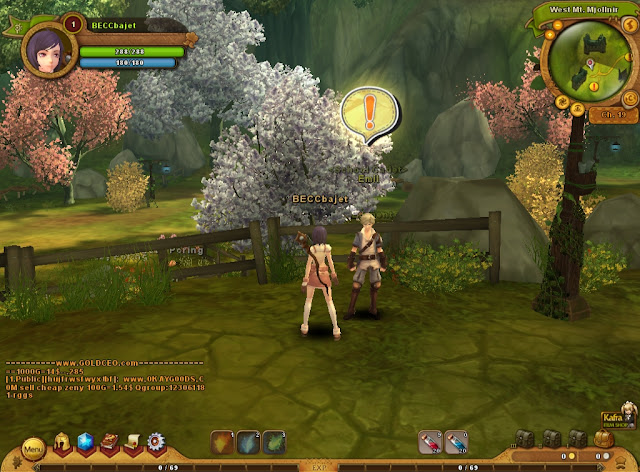 |
Quests are taken from NPCs with a yellow balloon above the head showing Exclamation mark.
To interact with NPC, just right click. |
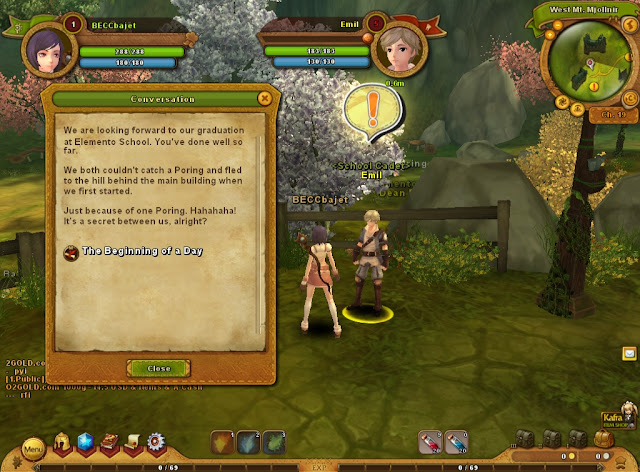 |
Upon right clicking the NPC, new quests are to be listed in WHITE text.
Select the quest by clicking on to it. |
 |
Quests has descriptions for you to know what will you need to do.
It has also rewards given like EXP, Rupee (Zenny & Items in later quests)
You can either Accept or Reject the quest. |
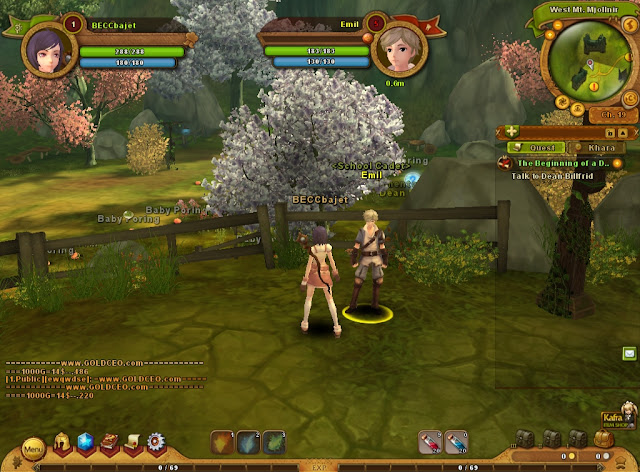 |
| Once you have accepted the quest, you will see on your right side the quest log. |
 |
Some quests are easy as just talking to other NPCs to accomplish it.
You will se NPCs with Blue Balloon with Question mark if you have finished a quest. |
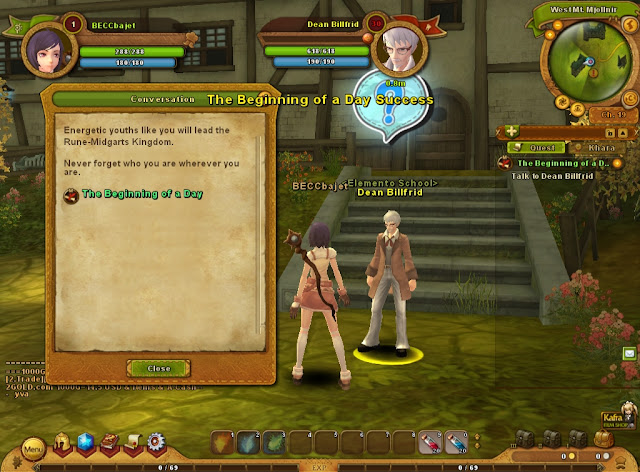 |
| Finished quests are in GREEN text. |
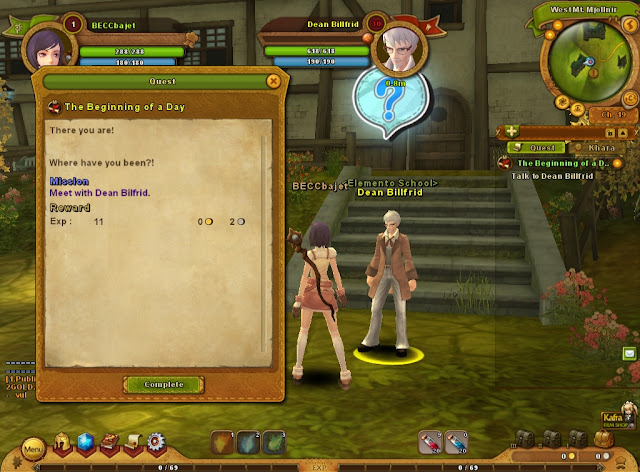 |
Since you have finished a quest you can get the rewards by clicking COMPLETE.
Most of the time, quests are chained to the next quest.
All you have to do here is finish all the quest all throughout the game. |
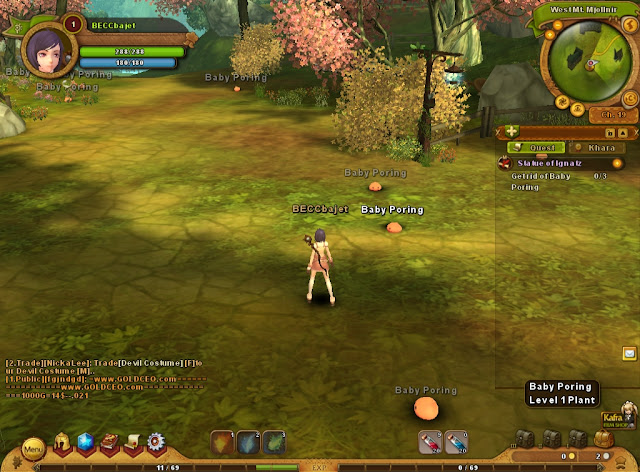 |
You can attack directly a monster by right clicking on it.
You can also left click on it so it will be selected and then you can cast your skills on it.
You can also try using "TAB" to randomly select nearby monsters. |
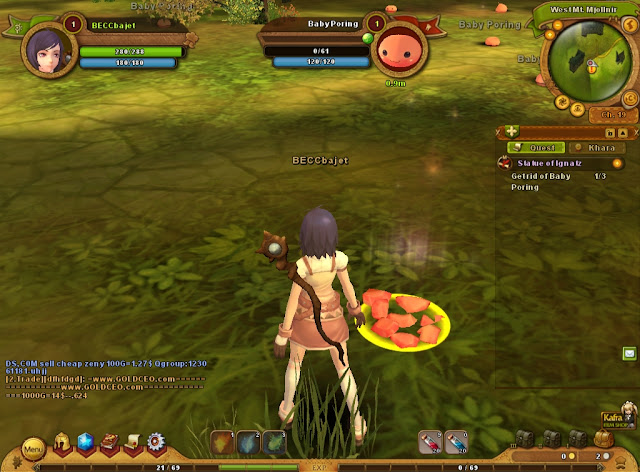 |
Most of the time killed monster do have items for looting.
It indicates to have loot if the dead monster is glowing as shown in the screenshot. |
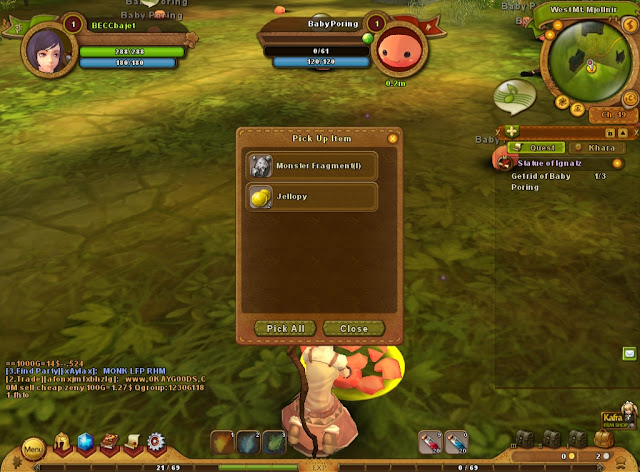 |
| You can right click on the dead monster for looting or you can use the hotkey "R" for auto looting. |
 |
| After looting, Professions like Chef and Artisan can carve out materials from dead monsters for their craft. |
 |
| For Blacksmith Profession, they get their materials from Minerals. |
 |
| For Alchemist Profession, they get their materials from Wildflows. |
 |
| Some quests involves gathering certain objects which are easily be recognized since they are glowing same as to gathering Profession materials. |
 |
| Once you have leveled up, you can add stat points by clicking the button from the left of your Character Info. |
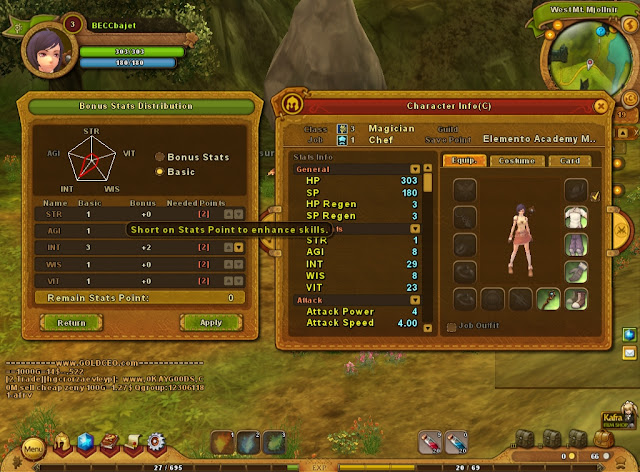 |
You can distribute it by Stats available (STR, AGI, INT, WIS, VIT)
You click APPLY after you have decided the stats distribution. |
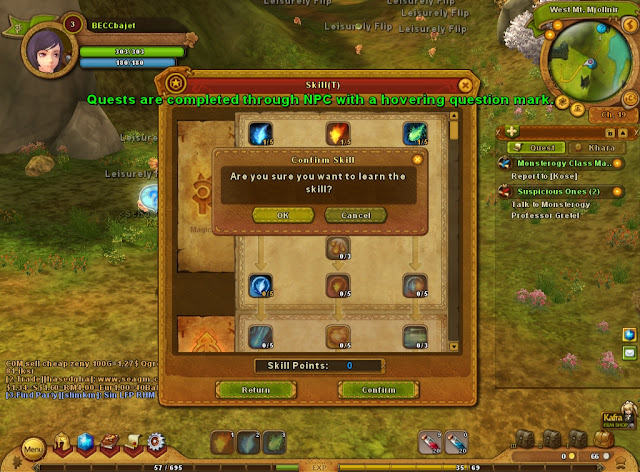 |
You can also distribute skill points for every level up you got.
Unlike the stats distribution, skills distribution requires confirmation. |
I will update this beginners guide from time to time. Thanks for your time.


No comments:
Post a Comment