Part 1 | Part 2 | Part 3 | Part 4 | Part 5 | Part 6 | Part 7 | Part 8 | Part 9 | Part 10 | Part 11 | Part 12 |
Just finished applying the decal markings.
 |
| Legs unit |
 |
| Legs unit |
 |
| The tweezers helps me hold the parts easily without touching the part. It prevents me from removing the weathering I already applied. |
 |
| Head unit |
 |
| You'll be needing these things. Plastic Cement | Hobby Knife | Sanding Paper | Part that you will remove seam lines. |
 |
| First, you have to examine the parts whether which portion you will not need to apply the plastic cement. |
 |
| Leg + Arm + Shield armor parts |
 |
| Legs unit |
 |
| Arms unit |
 |
| Everything are loose and I can't barely make him stand properly. The scythe is broken in the middle of the handle. |
 |
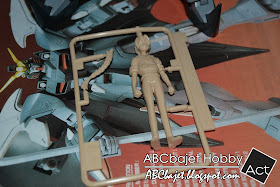
| My friend also included the 1/20 Scale Duo Maxwell figure and the manual as well. |
 |
| Waist unit |
 |
| Body unit |
 |
| Body unit |
 |
| Body Unit parts |
 |
| Applying waterslide decals is fun though a bit hard for me since this is my first time. |
 |
| Tactical Arms II: Complete |
 |
| Page 1 |
 |
| Page 2 |
 |
| Manual |
 |
| Box Art: Front |
 |
| Box Art: Top | Bottom |
 |
| The store sent this package via XEND which is handled by LBC. A customized box was used on this. |
 |
| The Mr. Mark Setter & Softer is nicely hidden inside the Gundam box. I think couriers don't accept liquid forms to be shipped. |